


Dash Cam Installs That Last: Clean, Legal, and Reliable
Installing a dash cam isn’t just about sticking a lens to your windshield. You want clean wiring, legal placement, and dependable footage—without headaches later. If you’ve ever wondered whether that mount blocks your view, worried about wires near airbags, or dealt with glitches from the wrong power source or memory card, you’re not alone. Those issues are exactly why a careful install matters. In this guide, you’ll learn how to plan, power, mount, and maintain your setup so it works when you need it most. You’ll also see where Vantrue automobile dash cameras fit into long‑term reliability without turning this into an advertisement.

What to Look for in a Dash Cam Brand
You get better results when your camera brand supports you after the sale. Look for clear manuals, ongoing firmware updates, and optional connectivity so you can evolve from simple driving footage to parked protection or remote alerts. Brands that offer a dedicated support hub, an optional LTE module for cloud features, and straightforward accessories (such as hardwire kits and electrostatic stickers) make installations cleaner and upkeep simpler. If you’re researching options, Vantrue automobile dash cameras, such as the N4 Pro, provide the building blocks you need without forcing you into a single configuration.
Pre-installation Planning
Clarify Objectives and Features You’ll Use
Decide what you need now and what you might add later. Do you only need a front view, or would you also like interior and rear coverage? Will you use parking surveillance, GPS overlays, or remote alerts through an LTE accessory? Your answers determine power needs, storage capacity, and the final mounting position.
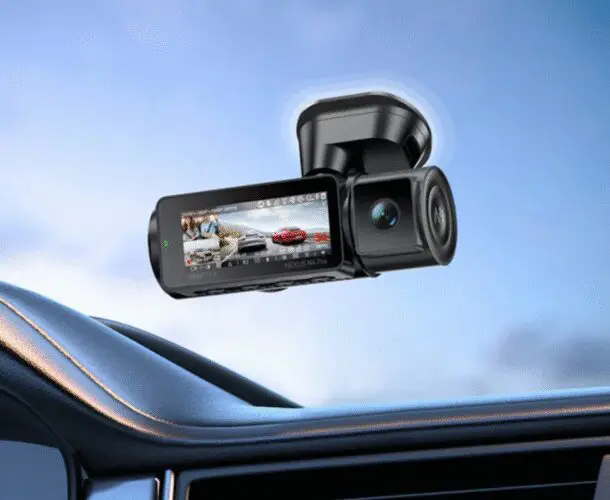
Check Legal Placement and Visibility
Mount high and centered, typically behind the rear‑view mirror within the wiper‑swept area, so you don’t obstruct your view. Keep the lens clear of tint bands and sensors, and confirm the position against your local regulations before you install anything.
Confirm Model and Accessory Compatibility
Before you buy a dash cam, verify the supported microSD capacity (some current models support up to 1TB), whether you’ll need a hardwire kit for parking mode, and if add‑ons like LTE modules or CPL filters are compatible with your specific camera.
Powering the Dash Cam
Hardwire Kits for Parking Surveillance
Parking modes need constant, protected power. A dedicated hardwire kit adds a low-voltage cut-off to protect your battery and keeps the installation tidy by tapping into the fuse box. If you’re unsure about fuse choice or thresholds, consult your vehicle documentation or a professional installer.
ACC‑Triggered Installs vs. Constant Battery Feed
ACC‑only power turns the camera on and off with the ignition—great for driving, not for parked recording. Constant battery power unlocks motion and impact detection when the car is off. Use battery protection and set conservative timers to prevent draining your battery.
OBD Power as a No‑Fuse‑Tap Alternative
An OBD‑II adapter can provide a quick connection for some setups. Behavior varies by vehicle, so confirm if your port is switched or always‑on, and still use battery protection if you enable parking mode.
Power Considerations for Automobile Dash Cameras
If you park for days at a time, consider a dedicated dash‑cam battery or short parking timers. If you drive daily, a hardwire kit with reasonable cut-offs usually strikes a balance between protection and battery health.
| Power method | Pros | Cons | Best for |
| 12 V socket (plug‑in) | Fast, no wiring | Often ignition‑switched; messy cable | Rentals, temporary setups |
| Hardwire kit | Parking mode + battery protection; tidy | Install effort; fuse tap | Daily drivers, long‑term use |
| OBD‑II adapter | Tool‑less; minimal trim removal | May be always‑on; occupies OBD port | Quick parking‑mode setups |
Mounting the Camera Correctly
Suction vs. Adhesive Mounts
Suction mounts are repositionable but can loosen in high temperatures. Adhesive mounts offer a lower profile and a stronger hold once cured. If you want clean removal later, consider using an electrostatic film between the glass and the adhesive pad.
Adhesion Aids and Removable Films
Prepare the glass with isopropyl alcohol, apply it to the warm glass, and let the adhesive cure according to the instructions. Electrostatic stickers protect tint and make removal easier without residue.
Placement for Sensors and GPS Reception
Keep the camera high and centered for a clear view of the sky. Avoid blocking rain sensors, ADAS cameras, or the dotted tint band. Test-record for a minute to check framing before committing to a permanent adhesive.
CPL (Polarizer) Options
A circular polarizer reduces windshield glare and reflections, allowing license plates and the sky to appear clearer. It’s a small accessory that can make a big difference on bright days.
Cable Routing and Safety
Avoiding Airbag Deployment Zones
Never route cables across A‑pillars in front of side‑curtain airbags. Instead, tuck the wire behind the trim and alongside existing harnesses so nothing interferes with deployment or becomes a projectile.
Rear Camera Cable Runs and Vehicle Length
For SUVs, wagons, and vans, plan the run along the headliner and through the hatch conduit. Leave enough slack for the hatch to open fully without tugging the connector.
Test‑fit and Finalize Routing
Dry-fit the camera and cabling, check the view, confirm there is no slack, then button everything up. If removing trim near airbags makes you nervous, get help from a professional.
Storage Media Selection and Setup
Card Type and Speed Class
Continuous video needs sustained write speed. For 4K or multi‑channel recording, use a card rated for video speed (for example, V30) to avoid dropped frames and file errors.
Capacity Limits and Compatibility
Match capacity to your model. Some newer cameras support up to 1TB, while others have a lower maximum capacity. Higher capacities extend loop length and reduce the need for rewrites.
Environmental Durability and Endurance Ratings
Choose “high endurance” microSD cards for 24/7 or heavy parking‑mode use. They’re built for constant rewrite cycles and temperature swings that ordinary cards don’t always survive.
Storage Guidance for Automobile Dash Cameras
Format the card regularly—every few weeks for typical use, weekly for heavy use. Use the in‑camera format option if your model provides it.
Connectivity, Apps, and Cloud (Optional)
LTE Modules and Model Compatibility
If you want remote alerts, live view, and cloud uploads, confirm your model supports an LTE accessory. Check how remote wake, push notifications, and upload quality are configured in the app so you control data use.
SIM and Data Planning
Cloud features consume data. Select a plan that suits your preferred frequency of remote access or automatic event uploads, and establish limits for upload quality to stay within your budget.
Apps, Manuals, and Firmware Updates
Keep the mobile app and firmware up to date. Centralized support pages make it easy to find manuals, firmware, and accessories when you need them.
Initial Configuration and Calibration
Power and Parking Mode Thresholds and Timers
Set conservative voltage cut‑offs and timeouts, especially if your car sits for days. Verify that the camera sleeps and wakes as expected by performing a quick bump test after parking.
Image Settings and Framing Checks
Record short day and night clips. Adjust the exposure compensation and fine-tune the angle so that plates are readable without cutting off the horizon.
GPS Overlays and Time/Speed Stamping
Enable time sync and, if desired, speed overlays. They’re useful for troubleshooting and incident review, but confirm local rules if you plan to share clips.
Post‑install Checks and Upkeep
Functional Day/Night Test Clips
Capture a few minutes of footage in varied lighting and review it on a larger screen to ensure the signage and plates are clear.
Media Maintenance and Formatting Cadence
Schedule regular formatting and replace cards as they near their rated hours or when the camera warns of write issues.
Mount Adhesion and Cable Inspection
Heat cycles and vibration can loosen things. Press‑check the mount and inspect cable runs quarterly, especially at the hatch and door jambs.
Conclusion
A solid dash-cam installation is mostly about planning and discipline: ensuring a legal placement that preserves your view, providing protected power for the features you want, carefully routing around airbags, and storage that can handle non-stop recording. Do that, keep firmware current, and your dash cam will quietly do its job—until the day that footage really matters. If you’re ready to compare systems, keep an eye on brands with strong support and optional cloud connectivity—Vantrue automobile dash cameras are one example—so you can start with a simple setup and add capabilities over time.
Read more on
MyCarHeaven are on Instagram. Go check us out and do follow us.
Go visit the MyCarHeaven Instagram page. We post regular quality content, predominantly focused on classic cars, supercars, hypercars and car shows. We also feature all our competitions here, where you will have the chance IF YOU FOLLOW US and you follow the competition entry criteria, you could be in with a chance of winning tickets to the best UK car shows, and other automotive stuff.
Go to the MyCarHeaven Instagram account here. Advertisement
 Advertisement
 Advertisement
 Advertisement