


imple Guide to Thoroughly Detailing Your Car’s Exterior

If you’re still using buckets, sponges and hoses to clean your car, you’re in for a surprise. This doesn’t do much to get all the collected dirt, dust, grime and road debris off the paintwork or the inside. For this, you’ll be looking at car care products that not only get rid of surface contaminants but also tend to damage. And protect your car with a ceramic coating, no matter how or where you drive.
Car detailing goes deeper than a regular wash. It also brings lasting results, so your car looks new, just like the day you got it. The number and type of specialty products have grown over the past few years. Car owners can now use the same gear as professional detailers but can schedule the work in their own time, and detail their cars to their standards.
The wide selection of brands also means that interior and exterior car care products are affordable, primed to get the best finish on any surface or material, and readily available. There’s a huge range of products online, and you can get everything delivered to your doorstep within a couple of business days.
Detailing Basics
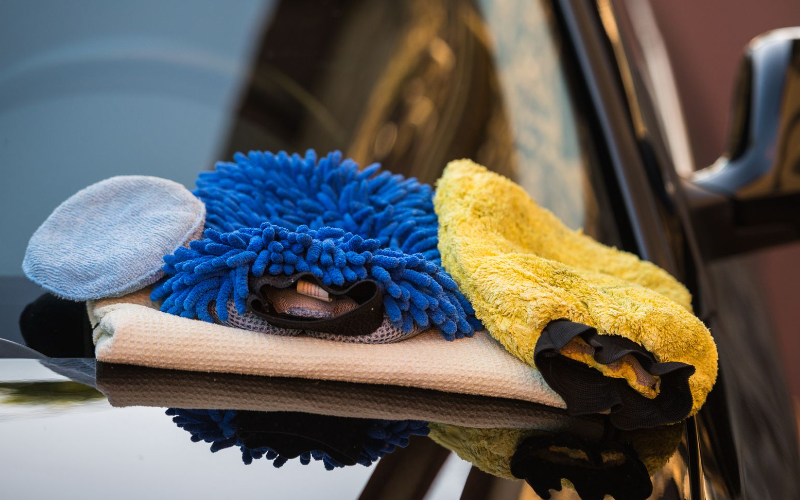
Tending to all the nooks and crannies is done in a specified order. Most pro detailers recommend the interior is done first. Here it would help if you had a decent Hoover, preferably one with a wet and dry function, a pressure washer for the mats, cleaning products that tend to the cloth or leather in the seats and the interior trim, and a glass cleaner for the windshield and mirrors. Microfibre towels, brushes and swabs get inside tight spots like the vents, and balms, conditioners and specialist products deal with trim accents, like the leather in the gear shifter and steering wheel.
Thorough detailing will take a few hours, depending on the vehicle’s state. Once you do this, there’s more elbow grease needed for the outside. Exterior detailing products are applied in stages and start with the parts that accumulate the most grime, the wheels. But before setting out to get your car’s exterior to showroom looks, first, you need to gather all your gear.
For the toughest grime and most efficient cleaning, consider professional-grade pressure washers and accessories from https://hotsysouthtexas.com/, trusted for their durability and performance in serious detailing applications.
Prepping Your Cleaning Products
The exterior consists of three distinct stages – cleaning the car, tending to surface damage, and protecting the paintwork. Different exterior car care products are used in each stage and with different goals. The cleaning stage removes ingrained surface dust and grime, the prep stage deals with rust and road damage, and lastly, you’ll want a decent layer of wax or sealant to keep up the looks for longer.
For the cleaning stage you’ll need:
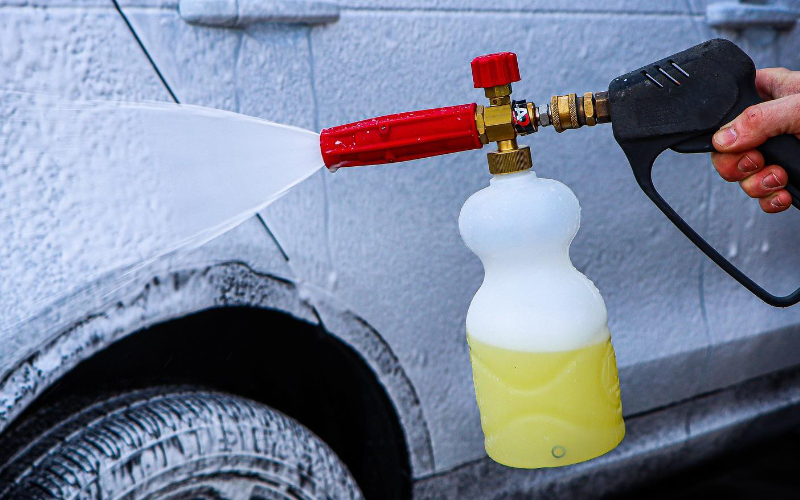
- A pressure washer with matching foam lance
- Wheel cleaner
- 2 buckets
- Pre-wash foam and car shampoo
- Mitts and drying towels
Optional items in the early stages include wheel brushes for stubborn stains, anti-swirl pads and electric blowers for faster drying.
For the paintwork prep stage, consider:
- Iron fallout remover and clay bars
- Bug cleaner
- Birdlime remover
- Tar and glue remover
This will depend on damage to the paint, alloys and glass.
Protecting the car requires you to apply:
- Polish to deal with swirls and scratches and restore sheen
- Wax to protect the car with a hydrophobic layer and keep it shining longer
Applying both can be done by hand and with wool, microfibre or abrasive pads, or you can use a range of polishing machines. Choose a dual-action polisher if you’re a novice and want something more forgiving, a rotary machine for more pronounced paintwork damage, or a direct-drive polisher for the best of both worlds. Many are also cordless for more convenience.
Detailing Stages
To get more of the grime out, and protect your vehicle for longer, follow set detailing stages:
#1 – The Wheels
Wheels accumulate a lot of road debris and are the dirtiest part of your car. give them a decent pre-soak, apply wheel cleaner, let it sit for a few minutes to get to ingrained dirt, and then rinse. Use wheel brushes to get to dirt in tight spots, and dry with a microfibre cloth.
#2 – Pre-wash Foam
Fill the lance with foam, attach it to the pressure washer and start spraying, from top to bottom. The foam should break up hardened dirt and contaminants. Let it stay for, then rinse.
#3 – Shampooing
Foam combined with a specialist car shampoo does the best to release remaining stains, dirt, grease and other nasties. They differ from regular household solutions in that they’re easier on the paint and metal, and can be optioned to leave a gloss or matte finish. The shampoo is applied from top to bottom using mitts. make sure to get into nooks and crannies, and deal with leftover dirt with brushes with the right bristle hardness.
#4 Dealing With Remaining Contaminants
Preparations before polishing and waxing involve getting rid of remaining stains, and slight damage. Use clay bars to deal with asphalt spray, rusted areas with iron fallout cleaner, and droppings with birdlime cleaner. This prevents further damage to the paint and serious corrosion. Follow up by rinsing, and removing swirls or watermarks.
#5 Polishing and Waxing
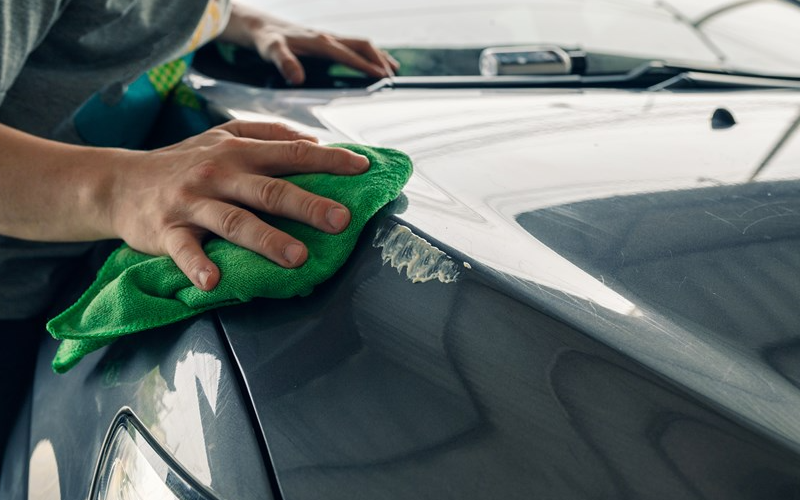
Polish removes swirls, scratches and paintwork blemishes. This can be in varying strength. Medium-cut polish will deal with most surface damage but for serious cases, like oxidation and deeper scratches, heavy-cut abrasive polish is your best bet. Finer polish compounds are used in finishing, and preparing the paintwork for wax. Where no visible damage is present, you can use a general-purpose polish. Most also leave a neat, gloss finish.
Waxes and sealants form a protective layer, can fill in minor dents and scratches, and help with smudges and stains. The final layer does a good job of preventing fading from sun exposure, chemicals and water spray. Both polish and wax can be applied by hand using pads or by machine.
#6 Bringing the Glass to a Sheen
Glass cleaner is usually in a spray bottle. This does well on the windscreen, windows and mirrors, is applied with a basic microfibre cloth (or a special glass cloth if you’re picky) and prevents water spots and swirl marks.
#7 Finishing Up
You can end the job here, or continue with a dab of tyre cleaner and dressing, add some general-purpose cleaner to the remaining bodywork trim, and clean the headlights with headlight sealant.
A full exterior detail should be done in mild weather and twice a year if you maintain your car regularly. Products can be bought on their own, or if you’re just dabbing into the detailing world, there’s more value when buying complete packs with everything you need.
Read more on
MyCarHeaven are on Instagram. Go check us out and do follow us.
Go visit the MyCarHeaven Instagram page. We post regular quality content, predominantly focused on classic cars, supercars, hypercars and car shows. We also feature all our competitions here, where you will have the chance IF YOU FOLLOW US and you follow the competition entry criteria, you could be in with a chance of winning tickets to the best UK car shows, and other automotive stuff.
Go to the MyCarHeaven Instagram account here. Advertisement
 Advertisement
 Advertisement
 Advertisement